
Split Header Column Became Two Column
Tomorrow night, one of my blog visitors has been ask to me how to insert search engine at the header blog? Hmmmm... All right... I try to answer this question. To inserting a search engine or everything at the header column, you must split your header column became 2 or 3 column. For example I'm has been split my header column became 2 column.Much technique to split header column, however I will show you my technique at my free template magazine template 1, so before you exercise to split header column please download template here! And then please create a new blog for practice.
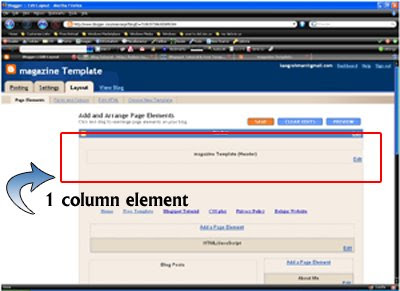
Are you ready to do some action with me? All right.. follow these steps. Go to your page element, and you will find template structure like this :
Now we will change the header column become 2 header columns. Click Edit HTML tab, go to your template code and find the code like this :
/* Header
===================================
*/
#header-wrapper {
width:900px;
margin:0 auto 0px;
background:$bgheadercolor url(http://ahom24.googlepages.com/magazine_01.jpg) no-repeat top center;
height:190px;
}

#header-inner {
width:900px;
background-position: center;
margin-$startSide: auto;
margin-$endSide: auto;
}

#header {
margin: 0px;
text-align: left;
color:$pagetitlecolor;
}
Delete above code and replace with this code ;
/* Header
===================================
*/

#header-wrapper {
width:900px;
margin:0 auto 0px;
background:$bgheadercolor url(http://ahom24.googlepages.com/magazine_01.jpg) no-repeat top center;
height:190px;
}

#head-inner {
width:600px;
background-position: left;
margin-left: auto;
margin-right: auto;
float:left;
}

#header {
margin: 0px;
text-align: left;
color:#ffcc66;
}

#r_head{
width:300px;
float:left;
padding-top:10px;
}
Go to lower side and find the code like this :
<div id='header-wrapper'>
<b:section class='header' id='header' maxwidgets='1' showaddelement='no'>
<b:widget id='Header1' locked='true' title='Test Blog (Header)' type='Header'/>
</b:section>
</div>
Delete above code and replace with this code :
<div id='header-wrapper'>
<div id='head-inner'>
<b:section class='header' id='header' maxwidgets='1' showaddelement='no'>
<b:widget id='Header1' locked='true' title='Test Blog (Header)' type='Header'/>
</b:section>
</div>
<div id='r_head'>
<b:section class='header' id='header2' preferred='yes'/>
</div>
</div>
Click SAVE CHANGES button and done.
Now click Page Elements tab and you will see your header column become 2 columns :

OK guys, now you can add anything at the new element in the right header.
If you feel interest with this post, please digg it.
See you next time at my new tutorial.
No comments:
Post a Comment